First things first, I didn't take that gorgeous picture up there, or the gorgeous one below. Felipe of Petruzzo Photography just took our holiday pictures, and he took these for us. I made the banner for the photo shoot. I can't wait to put it up for the holidays! I am not really that crafty, this was just a little Modge Podge, ribbon, wood boards, sealing spray, and craft paint. But I love the way it turned out! The wooden boards are from Pick Your Plum, follow the link to win a Plumbox. They were just blanks, but cut out and pre-drilled with holes.
I'd love to know if you make this, or what you think of it, leave me a comment and let me know!
I'd love to know if you make this, or what you think of it, leave me a comment and let me know!
Noel Banner Tutorial
Wood blanks with holes- any shape you want
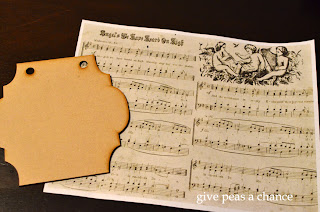
Printed papers- links are below
Modge Podge
Craft paint- brown, gold, black, and a Staining Antiquing Medium
Ribbon
Krylon sealing spray
Brushes or sponge brushes
Print out the papers.
Rip the papers to fit, or cut them in the shape of the board. Apply Modge Podge to the back of the papers with a paint brush or sponge brush. Paste them on to the wood board. Let this dry before applying the letters on top with Modge Podge.
Once all the pieces have dried, brush them all lightly with Modge Podge. Let them dry.
Mix a little brown, black, gold, and Staining Antiquing Medium. Or any colors you want. The letters were on bright white back ground and the Christmas papers were an antiqued brown so I decided to make it match a bit more. Brush on the paint and then gently wipe it off to antique it.
Let the boards dry. Spray them with Krylon to seal. Attach ribbon.
Let the boards dry. Spray them with Krylon to seal. Attach ribbon.
Noel Banner Tutorial
Wood blanks with holes- any shape you want
Printed papers- links are below, or find ones you like
Modge Podge
Craft paint- brown, gold, black, and a Staining Antiquing Medium
Ribbon
Krylon sealing spray
Brushes or sponge brushes
- Print out the papers. Or any papers you want to use. Find a different font you like better? Use it.
- Rip the papers to fit, or cut them in the shape of the board. Apply Modge Podge to the back of the papers with a paint brush or sponge brush. Paste them on to the wood board. Let this dry before applying the letters on top with Modge Podge.
- Once all the pieces have dried, brush them all lightly with Modge Podge. Let them dry.
- Mix a little brown, black, gold, and Staining Antiquing Medium. Or any colors you want. The letters were on bright white back ground and the Christmas papers were an antiqued brown so I decided to make it match a bit more. Brush on the paint and then gently wipe it off to antique it.
- Let the boards dry. Spray them with Krylon to seal. Attach ribbon.
Background Vintage Christmas papers are free printable from Altered Artifacts.
The letters are printable from I Heart Naptime, from a gorgeous banner that she has up.
Wood boards from Pick Your Plum.


Beautiful! I love using the music pages.
ReplyDeleteHi, I’m Anne from Life on the Funny Farm (http://annesfunnyfarm.blogspot.com), and I’m visiting from Farmgirl Friday.
ReplyDeleteThese are beautiful! This is a great tutorial.
Anyway, thanks for posting this. I hope you can pop by my blog sometime to say hi…
I will thanks!
DeleteSO,SO LOVELY!Thanks so much for sharing the great tutorial! I'd love for you to visit my blog.
ReplyDeleteHappy week!
Hugs from Portugal,
Ana Love Craft
www.lovecraft2012.blogspot.com
thanks Ana I will!
Delete